How to Connect WiFi Repeater to Host Router At Home?
Are you interested in setting up the Wireless-N WiFi repeater by following the easy Wireless-N WiFi repeater setup instructions given in the user manual? Well, we would suggest you that you skip this. Instead, you ought to refer to the guidelines in this blog. The reason being, the steps given in the user manual are not user-friendly. You will get puzzled and end up facing setup issues. To prevent yourself from facing them, it is recommended that you do as suggested, i.e. read the instructions mentioned in this blog post. The base of this guide is how to connect WiFi repeater to host router before the actual setup.
We will be focusing on it because the connection between the repeater and router will decide how smoothly your setup process will be for you. Considering this, you should keep reading the information given below.
How to Connect WiFi Repeater to Router [Easy Steps]
There are two methods through which you can learn how to connect WiFi repeater to router. The first is wireless and the second is wired. We have talked about both of them in this post. Whichever you find the most reliable, you may use that source.
Wireless Source
Connecting the networking devices wirelessly is possible using the WPS button. Taking this into account read these instructions to get an understanding of how to connect WiFi repeater to router using the WPS or the WiFi Protected Setup method:
- Locate the WPS button on the extender and then press it.
- Do the same with the host router.
- Just make sure that you do this after waiting for about 2 minutes.
- Now, wait for the LED light to become solid.
Locate the Wireless-N repeater to a different place. Ensure that it is not kept near cordless phones, washing machines, mirrors, fish tanks, treadmills, televisions, microwave ovens, refrigerators, Bluetooth speakers, refrigerators, and much more.
Wired Source
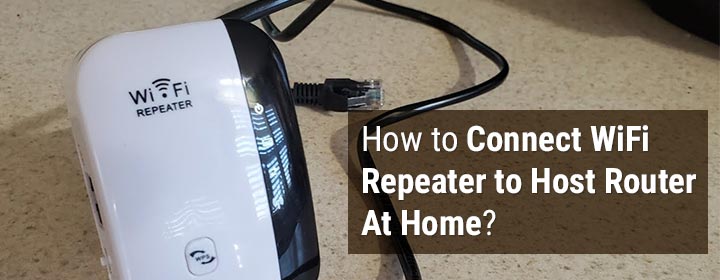
Another method through which you can learn how to connect WiFi repeater to the router is using a cable or wire. In simple words, you need to make use of an Ethernet cable to connect the networking devices. Here is how you can so:
- Plug your Wireless-N repeater into a wall socket.
- Ensure that the socket is neither damaged nor short-circuited.
- Once done, press the power button and let the light become stable.
- Get your hands on an Ethernet cable.
- Connect one end of the cable to the extender and another to the router.
- Make sure that you are using only a damage-free Ethernet cable.
- Apart from this, there should be no loose ends.
Leaving the connection loose will only force you to come across the setup issues. And once that happens, then you can clearly forget about gaining access to a blazing-fast and seamless internet connection on your client devices.
Done Learning How to Connect WiFi Repeater? What Now?
Now you need to continue the configuration process of your Wireless-N WiFi repeater. For that, you ought to read the process explained in this segment of the blog:
- Switch on your computer and connect it to the network of the repeater.
- For this, you need to locate the SSID of your repeater and enter the password.
- Click the Connect button and wait for the device to access the internet.
- Once you have accomplished this, open an internet browser on your computer.
- You can either open the most used one or your favorite one.
- Go to the address bar or the internet browser and enter the IP address.
- Pressing the Enter key will take you to the login page.
- Enter the required admin login detail and hit Login.
- Now, you may have to read and implement the instructions given on the screen.
Once you are done setting up your Wireless-N WiFi repeater, you are free to access the internet on all your client devices. Regardless the number of devices which you connect to the repeater, the speed will not get less.
Verdict
Here ends the guide discussing the instructions that can help one to learn how to connect WiFi repeater to the host router and execute the remaining setup process.